Quick answer: clean makeup brushes regularly — weekly for face brushes, 2–3× weekly for cream/liquid tools, and daily spot‑cleans when needed. Proper washing, careful drying and occasional deep sanitizing keep brushes safe, soft and performing well.
That short rule covers most people, but the details matter. Below is a clear, practical workflow that starts with what you want the brushes to do, then walks through daily, weekly and deep‑clean routines, drying and storage. Follow the parts that match your routine and tools.
What you’re aiming for: performance, hygiene and longevity
Clean brushes apply color evenly, blend without streaks, and don’t transfer bacteria to your skin. You want bristles that are soft, retain shape and shed minimally. Over‑aggressive cleaning or the wrong drying method is the most common cause of damaged brushes.
Quick daily or between‑use refresh
- For powders and quick changes: use a dry brush cleaner spray or microfiber brush sponge to lift surface pigment. Swipe the brush back and forth on the sponge to remove loose powder.
- For liquid/cream products: after use, wipe on a lint‑free towel or makeup wipe. For heavy stains, do a mini wash (see slow method below).
Weekly deep clean — the basic method that works for most brushes
Do this for foundation, concealer, cream blush, and any brush used on acne‑prone or irritated skin. Also do weekly for eyeshadow if you use bold pigments.
- Gather tools: gentle brush soap (or a mild baby shampoo/solid brush soap), a bowl, lukewarm water, a clean towel and a drying rack or flat surface. If you have sensitive skin, use an antibacterial brush cleanser to sanitize without harsh detergent.
- Wet bristles only: run bristles under lukewarm water with the ferrule (metal part) angled down so water doesn’t seep into the glue at the handle. Avoid hot water — it can loosen glue and warp bristles.
- Create a lather: swirl the brush in your palm or on a textured cleaning mat with a small amount of soap until you see pigment lift and a light foam forms. For dense foundation brushes, gently knead the bristles to pull product out from the base.
- Rinse thoroughly: keep ferrule angled down and rinse until water runs clear. Repeat lather and rinse if the brush was heavily soiled.
- Remove excess water: press bristles gently between your towel to squeeze out water — don’t wring or twist which can splay bristles.
- Reshape and dry flat or upside‑down: reshape the tip and lay brushes flat on a towel with the bristles overhanging the edge of a counter, or use a drying rack that holds them horizontally. Never stand brushes upright while wet — water will run into the ferrule.
When to sanitize and how to deep‑clean
Sanitize if you’ve used brushes on broken skin, had a skin infection, or want a deeper clean every 1–2 months.
- Mix one part isopropyl alcohol (70%) with one part water in a shallow bowl; dip the bristles only for a few seconds and blot dry. Alcohol evaporates quickly and helps disinfect, but repeated use can dry natural bristles, so reserve it for sanitizing rather than routine washing.
- For a deep clean of dense synthetic brushes, use an enzyme cleaner or a small amount of diluted household dish soap to break down oils; follow with a conditioner formulated for brushes (or a tiny dab of hair conditioner) to restore softness, then rinse thoroughly.
Electric brush cleaners: when they make sense and how to use them
An electric makeup brush cleaner speeds up washing and spinning dry time — useful if you clean many brushes often or need same‑day reuse.
Use the Electric Makeup Brush Cleaner and Dryer Machine 3-in-1 Automatic Deep Cleaning Tool with USB Portable Cosmetic Brush Cleaner for All Brush Sizes and Sponges when you want faster turnaround: attach the correct collar for each brush, immerse in soapy water for the wash cycle, then spin in clean water and use the spin-dry mode. Always finish by reshaping bristles and letting any residual moisture dry completely. If you’re considering an electric option, this 3-in-1 automatic cleaner is a practical choice for regular users who value speed and thoroughness.
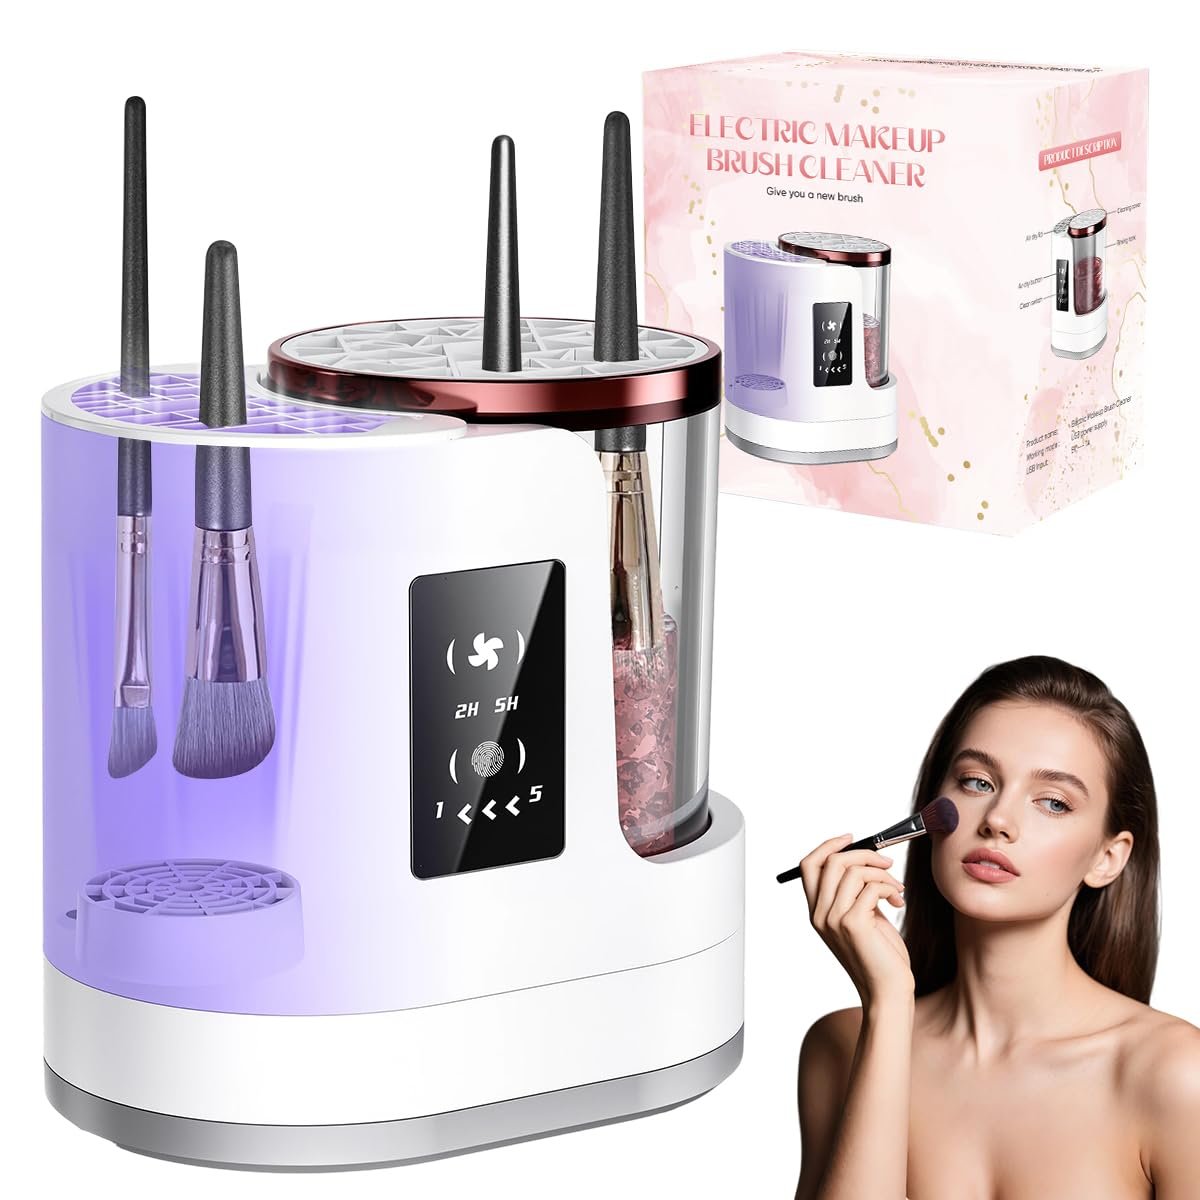
Electric Makeup Brush Cleaner and Dryer Machine 3-in-1 Automatic Deep Cleaning Tool with USB Portable Cosmetic Brush Cleaner for All Brush Sizes and Sponges
A catalog product selected because it closely matches this part of the beauty guide.
Drying tips to prevent damage and mildew
- Always dry brushes flat or with bristles down and overhang. This prevents water from reaching the ferrule and loosening glue.
- Don’t use a hair dryer on high heat. If you must speed things up, use cool air at a distance and avoid blowing into the ferrule.
- Allow at least 6–12 hours for full drying of face brushes; smaller eye brushes may take 2–6 hours. Ensure they are completely dry before storing to prevent mildew.
Storage and day‑to‑day care to keep brushes cleaner longer
- Store brushes upright in a cup with a ventilated lid or in a roll that keeps bristles protected but allows airflow.
- Rotate brushes: have one set in use while another set dries to avoid constant washing. For travel, use a brush guard or sleeve to maintain shape.
- Replace sponge and beauty blender items more often: sponges need cleaning after each use and replacement every 3 months or sooner if they tear.
When reshaping natural‑hair brushes after washing, use your fingers to reform the taper and then place a small rounded weight (like a folded towel) underneath the bristles to keep them from splaying as they dry.
Troubleshooting common problems
Brush smells even after washing
Either product residue or trapped moisture remains. Rewash with a small amount of antibacterial soap and leave brushes to dry in a well‑ventilated spot. For stubborn odors, soak bristles briefly in a vinegar solution (1:4 vinegar to water), rinse, then dry.
Brush sheds or loses shape
Excessive shedding often comes from old brushes, cheap glue, or aggressive washing. Reduce agitation, avoid hot water, and allow full drying. If a brush sheds continuously after careful care, it’s time to replace it.
Stiff or dried bristles after cleaning
Overuse of alcohol or harsh detergents can strip natural oils. Condition natural‑hair brushes with a drop of hair conditioner, rinse and reshape; limit alcohol sanitizing to occasional use.
How often to clean each type of brush (simple schedule)
- Foundation/concealer (cream/liquid): 1–2× weekly.
- Powder/blush/bronzer brushes: every 1–2 weeks unless used on oily or acne‑prone skin.
- Eyeshadow brushes: weekly to biweekly depending on pigment intensity and frequency of use.
- Sponges: wash after each use; replace every 1–3 months.
- Wash face brushes weekly; cream/liquid tools 1–2× weekly
- Always rinse bristles downward; avoid water in the ferrule
- Reshape and dry brushes flat or bristles down
- Use mild soap; reserve alcohol for occasional sanitizing
- Consider an electric cleaner to save time if you clean often
- Replace brushes that shed or smell after proper cleaning
Cleaning makeup brushes is a mix of routine and occasional deeper maintenance: frequent light refreshes keep makeup tidy, weekly washes remove oils and bacteria, and proper drying protects bristles. Investing a little time and the right tools extends brush life and keeps your makeup applying as intended.
Can I wash brushes with dish soap?
Yes for oily residue—dish soap cuts oils well—but use it sparingly and follow with a gentle rinse and conditioner for natural bristles to avoid drying them out.
Are electric brush cleaners worth it?
They’re worth it if you clean many brushes regularly or need them dry quickly; they speed up washing and spinning but still require careful reshaping and drying.
How can I tell if a brush needs replacing?
Replace brushes that continually shed, don’t regain shape after drying, have a persistent odor, or bleed color into skin despite cleaning.
Is it safe to use alcohol to sanitize brushes?
Yes in short dips for sanitizing, but frequent use can dry natural bristles—limit alcohol to occasional sanitation after infection or heavy contamination.
What’s the best way to dry brushes fast without damage?
Spin dryers on low or cool air can speed the process; otherwise dry flat with bristles overhanging a counter and avoid heat directly on the ferrule.